Title

Sufficient for Our Need
Striving for Self-Sufficiency in the Modern World

Sunday, October 6, 2013

October Onion and Garlic Report

Yesterday, i weeded the onion/garlic patch, leaving the onion shoots I saw in place. Actually, I had been weeding all along ever since I planted and the first sprouts came up, but I had left the weeds in place in the areas between each sprout. So, yesterday, i just cleaned the whole bed free of weeds and grass. I counted about 50 sprouts. Given that I planted to grow about 150, I'm not feeling entirely successful.
I had added new seeds to some of the area before I left for Northern Ireland a couple of weeks ago. But it really hasn't rained since and I haven't watered. As far as I know, these seeds are still just sitting in the ground. I watered after I weeded yesterday, so perhaps new sprouts will emerge. I can be patient and will continue watering now that I am home.

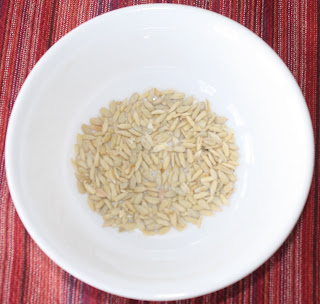
It occurred to me this morning that my strategy could use a little adapting. When I planted earlier I went through an elaborate strategy to glue seeds to napkins. For my pre-Irish catch-up, I just sprinkled seeds. Of course, getting seeds requires breaking open pods, which is also laborious. Today I thought, why not just plant the pods? There are probably (someone should really know for sure) 4 to 6 seeds in each pod. That's how nature probably does it; keeps the seeds in the pod until they sprout. So I took 50 seed pods (pictured) and planted them directly in the soil. I know where I planted them so we will see how they sprout.

I can think of two additional reasons (other than ease) for keeping seeds in the pods and just planting the pods. First, taking the seeds out of the pods might be damaging to the seeds. You often have to crush to pods to break the seeds loose, which might cause harm to the seeds. Second, the way pods are constructed, it would seem that they have a natural ability to trap just a little bit of moisture. This may be important for germination.

Garlics on the other hand have sprouted well. Of the 32 cloves I planted, 31 have come up. I will have more garlic than I can use, but there are always friends and other gardeners.

Saturday, August 31, 2013

Garlic and Onions

I only planted 8 cloves of Chet's red garlic last fall. Only 7 came up. Of those, I did something with 5, leaving just 2 for planting this fall. The ones from the previous season had sprouted this spring, and I planted a number of them. I harvested all of the spring planting, leaving none of them for seed for the coming year. Of the 2 garlic that I set aside for planting, I was able to get about 40 cloves. I kept 32 of them for my own garden and gave the remainder to my friend Steve at church.

I planted the 32 during the week. Nothing has come up yet. I don't need them all to sprout, but I am glad to keep the variety growing in my garden.

Last fall, I scattered onion seed in one of my beds. I think my reasoning had been that trying to plant the year before in prespecified positions hadn't worked well. The sprouting was spotty. But there were two problems last year. First, there were just too many onions that sprouted. Second, I think all the seed came from first-year plants, meaning that for what is supposed to be a biannual, there was no "bi" in when the plants went to seed. As a result, just about every onion in my garden went to seed again this year. Essentially, my onions became annuals.

This year, I am attempting to solve both problems. I am attempting to solve the first problem of scattering seed by going back to a 4-per-square-foot planting system. I used napkins and a glue stick to allow me to create little patches of seeds. Then, I cut up the napkin so I could plant each bunch of seeds separately. I picked a napkin as the medium to glue the seeds on because I think the paper will dissolve pretty rapidly once wet, allowing the seed to send its roots down. I planted these today, 4-per-square-foot, more or less evenly throughout the same bed in which I planted the garlic. (The garlic occupy 2 of the 12 feet, the onions the remaining space.) I hope to have about 150 or so onions from this. That will be plenty to harvest next June.

The second issue was using annual seeds instead of biannual seeds. I purposely kept about 10 onions (long red Florence) alive through the winter and let them go to seed the second year. I used those seeds, as I trust that only a few will got to seed early. That variety was generally a better variety for not going to seed early when I have raised them in the past.

Now seeds and cloves just have to sprout.

Saturday, August 24, 2013

Great Balls of Dirt

I thought I was through writing about sunflowers, but there is always clean up to consider. It occurred to me, of course, that for a plant to grow as thick and as tall as a sunflower, it had to have roots. But, having never seen a sunflower root before, I didn't quite know what to expect. Each plant was pretty well anchored with a good thick ball of roots. I wasn't successful uprooting plants until I used the garden fork to loosen dirt around the base of the plant. But even then, the root came up as a large ball. Indeed, taking care of each sunflower was about like trying to deal with a small tree.

The next challenge I faced was just how to get to dirt off of the root. In a raised bed, dirt is precious. And it is apparent that a lot of whatever was in the dirt was up in the air in the stalk of the sunflower plant. Many of the stalks were about an inch in diameter at the base. My solution to getting the dirt off involved finding yet another use for the cold frame hoops. I primarily use the cold frames to brace myself while I bend over the garden boxes. The second use is when I grow tomatoes, as a way of anchoring the cages so they don't blow over when the tomatoes get big and the wind blows. Their use for me as a device to hold up plastic sheeting in the winter is in doubt. (I wasn't very successful growing things in the past this way.) So now the next use is as something to bang the root ball against to get the dirt attached to the roots of sunflowers off and back into the raised bed.

Sunday, August 18, 2013

Wet Weather and Tomatoes


I'm sure there are plenty of people in my neck of the woods who have had success with tomatoes this year, but the common complaint I have from friends is that it has been too wet and tomatoes have not done well.

After last year's dismal tomato harvest, I was committed to not even try. Last year was the year I tried to dedicate the garden to growing heirloom varieties. They just didn't do well.

This year, I wasn't even going to plant any, but Kathy wanted some. So we went to the Farmer's Market and bought some hybrids. I have since looked and I can't find the labels that state what variety they are. All I know is that we bought a four-pack of one variety and a single of another.

Given the few plants we have had, I was surprised the other day to come home and find that Kathy had enough tomatoes to can some. And the plants continue to produce.


I understand the theory of growing heirloom varieties. Heirlooms can be grown from your own seed year-after-year-after-year. But here's the deal, the hybrids are doing well. I also understand the theory of growing tomatoes from seed. You gain important understanding about self-reliance when you grow tomatoes from seed. But the deal here is that what we planted took a lot less energy and made a lot less mess than going the heirloom route.

Saturday, August 17, 2013

Hoses


The water barrels have been full most of the year. There has been a lot of rain and I've hardly needed to use them. However, that is not universally the case. The other day, I wanted to use the water. Turning on the spigot, the water just dribbled.

This same event happened two years ago. At the time, I think my solution to the problem was to try to use water from just two barrels at a time. That would provide maximum flow and have the potential to keep muck from growing in the hoses. However, this year, the flow was so slow that I thought I needed to try a different approach.

The problem as I see it is that algae and other kinds of junk grow in the slow moving water that is in the hoses. What I needed to do was clean that out.

The way I have constructed the hose system, I actually had to put female hose connections on both ends of the hoses coming from the barrels. Essentially, I turned the spliters backwards. They are designed to take one source and split the water into multiple streams. I used them to take multiple streams and combine them into one. But, what that did mean is that the end that the water exits from into the hose that goes to the garden has a female end on it.

My solution was to take our regular hose, which is fed by the well and the pump and therefore has a lot of pressure in it when the water is turned on, and simply attached it to the single outlet. I then turned on the water full force and washed each barrel's hose to clean out whatever might be inside it.

The best part for me is that it worked.

After years of using these barrels, there is probably muck in the bottom. I know there is in the barrel that is fed from the roof because I can put my measuring stick down and feel the sediment. Someday I will need to clean it out. For now, I am just happy to have water flowing freely.

Sunday, August 11, 2013

More Sunflower Processes


What I have read about processing confectionery sunflower seeds is that you can separate husks from the edible part of the seed by running them through a stone mill. We happen to have a stone mill. We bought in the 1980s to grind wheat. It doesn't have a motor, just a hand crank, so it's not the preferred method to do just about anything. Still, for dealing with sunflower seeds, it seemed appropriate.

The method I read suggested opening the aperture of the wheels a bit, between and eighth and a quarter of an inch and grind away until you get seeds separating from husks. The stones are, indeed, adjustable. For me, it seemed that about an eighth of an inch worked well. As I turned the wheel and ground the husk, the seeds separated quite nicely. The photo on the left below is the result of processing a half filled bowl of seeds this way.

What is apparent from this is that the stone mill grinder does its job. Both parts fall down through the shoot. Clearly, this makes it easier to crack the seeds. What it doesn't do is separate the two parts. I ran one small batch through and sort of used a combined method of hand picking out the shells and blowing on the bowl lightly to see if that would separate the parts. It worked, but it was time consuming and messy. I had to do it outside and my shirt ended up covered with small bits of shell. The one problem I tried to avoid was loosing seed because I blew too hard. I'm not sure how effective it was.

I added a step with the larger batch of seeds. I had some quarter inch screen left over from another project. I first put the batch of cracked seeds on the screen. I actually tried to do too much at a time and so I had to work it around a bit. The screen caught the very biggest pieces of shell, about a third of the total batch. I dumped the part that was caught and did it one more time. That left about half of the total batch in the bowl below and, as far as I could tell, didn't leave any of the seeds on top of the screen. After this, I went outside and did my gentle blowing process again. Finally, I hand picked out the few remaining pieces of shell and whatever the other things were. The photo on the right is the result.

One thing is for sure, there isn't a lot of seed that results. It would take a lot of sunflowers to make a quart of seed. I understand now why you would need to dedicate acres to growing and good equipment for harvesting and processing if you wanted to do this economically. For us (well, me) this is just an experiment to learn about self-reliance. It's mostly just humbling to know how cheaply I can buy this stuff in the store.

Friday, August 9, 2013

Processing Sunflower Seeds


This is our first attempt at doing something with sunflowers. After I chopped the heads off (sounds a bit like the French revolution!) I put the sunflowers in the garage to dry. It might be a bit humid in our garage, but it is also quite warm in the summer. Mostly I think we just needed them out of the house and in a place where birds and other vermin wouldn't have access to the seeds.

After a couple of weeks, the backs on some turned yellow and the leaves all either fell off or shriveled. I brought them in the house and Kathy, Jenna and I used our thumbs to get the seeds out. It was a bit more time consuming than I expected. I thought they would just fall out. Instead, bending the flower and rubbing with your thumb seemed to get them to pop out, at least for the most part.

Kathy soaked some over night in brine and then baked them. The first batch were burned. The second batch was just great.


Sunday, August 4, 2013

Grape Jelly

In years past, we haven't had too much production out of the grape vines. Not that we worried to much about it. The seeded variety that I planted aren't much good as table grapes. By the time I usually got around to seeing how they were doing, they had mostly been eaten by birds. I don't think there were all that many clusters at any rate.

What is different this year is a 20-month old grandchild who loves to go out into the 3+ acres we call our yard and just run as far and as fast as he can. He thinks it's a game. Run and see if granddad will follow! We haven't visited the grape vines much in years past because it takes a bit to walk to them. But this year, that's were Matt headed and we followed.

I wouldn't call it a bumper crop, but clearly we had some grapes. So I went out and picked what I could. Then, I realized, we actually hadn't planned on doing anything with them. I just left them on the counter and Jenna, permit in hand, for a drive. (I believe in North Carolina's graduated driving system, but it means a lot of hours just driving around.)

When we returned, Kathy had sorted out the good from the bad and had washed and cleaned. Shortly after that, she had the good stuff simmering in a pot with the required amount of water. I joined in and used the food processor to strain out seeds and skins. Shortly after that, it was time for the pectin and sugar and a bit more boiling.

We had enough rendered jelly to just about fill 4 quarts-worth. We are almost out of canning bottles. We had 4 jelly jars and some pint jars left. The people I've told about it asked if we used a low-sugar recipe. (Thank you all for concern about my diabetes!) No, we used what the recipe called for. My guess is that you don't eat tablespoons full of jelly at a time. The last thing we tried to can as a preserve, peaches, didn't turn out well as a low-sugar product. Of course, the other thing we did this time was to boil the mixture until it was clearly ready to be put into jars.

This evening will be the test. We have some home-baked bread on the way -- the perfect medium on which to test it.

Saturday, August 3, 2013

Purple Sunflower Seeds


From what I have read, there are basically two types of sunflower seeds; black, which are oily, and white with gray stripes, which are best for eating. So, as I have been harvesting, I've looked to see what each sunflower head yields. I find it a curiosity primarily because I thought all of the seeds Jenna and I planted would bear the snacking variety.

In fact, most are either quite white with very light gray striations. There are some black seeds as well. It makes sense because some of the seeds that were planted were black. But then, I saw the sunflower head on the left of the photo. These seeds are clearly different than the rest of the heads. I placed it next to a typical light colored sunflower just to show the contrast.

I just harvested this one, so I'm not sure how it will end up. Perhaps the seeds will change color when they dry.

I searched and found that there are others who have also reported this. For example, Project Noah reported about a similar harvest. I even found a research abstract that addressed the issue.

The anthocyanin pigments in hulls of purple sunflower seeds have been identified by chromatographic, spectral and chemical properties. The four most abundant anthocyanins were identified as cyanidin 3-glucoside, cyanidin 3-malonylglucoside, cyanidin 3-xyloside and cyanidin 3-malonylxyloside. This is the first report of malonylated anthocyanins in sunflower seeds and the first characterization in plants of the malonyl xyloside.

If that's not informative, what is? My guess is that there is some mutation that I somehow picked up on. I plan to save some of these seeds and replant next year to see what I get.

Green Beans


We have green beans aplenty!

I planted Blue Lake beans four per square foot in one of my raised beds. So far we have picked about a third of the bed and have two plastic grocery bags full. I don't know exactly what we will do with them all. It's not like we eat that many!

Before we started to harvest, I picked a few one day for dinner. We watched Matt (our grandson) one evening and picked some more. His job seemed to be to dump them out of the bowl we were putting them in, then pick them up and put them back in the container.

Kathy and I went out the first evening we actually decided it was time to harvest or lose the crop. I think we picked for half an hour. I followed the next evening and did another half an hour's worth of picking. I think one more trip to the bed will complete the gathering task.

These beans are planted in the last raised bed to be built. The soil consists primarily of some sort of compost with about half a yard of peat moss mixed in. I don't consider it to be my best bed. But, as you can see from the photo, each plant seemed to do quite well in terms of numbers of beans produced and their size.

Sunday, July 28, 2013

Start of the Sunflower Harvest


Jenna was home for a day from her summer camp. While she was here, I thought we should start harvesting the sunflowers. Most of the Mammoth variety are still not quite there yet, although we did harvest one head. The Lemon variety were much more ready. In fact, the birds had already done a decent job on a number of the flowers. Still, we harvested more than a dozen flowers that seemed to have a number of seeds still in them. The Lemon variety have multiple flowers per plant. The Mammoth have only one, but it is much larger. The photo is of Lemon variety flowers.

The plan is to follow what has been published. The flowers now sit in a paper bag, waiting for them to dry.

One thing I have noticed is that the seeds all seem to hold to either the confectioner shades of gray and white or the oil producing shades of black, like the one in the lower right of the photo. In theory, all of the seeds planted this year were confectioner. My reading suggests that we may actually have a mixture of oil bearing and confectioner types.

Saturday, July 27, 2013

Canning Potatoes


If you ask, "Is it worth it to can potatoes?", the answer is probably, "No!"

In fact, you could probably say the same thing about growing potatoes in a home garden. Economically, there isn't much point. Potatoes are cheap and plentiful and of high quality in any grocery store.

This year's potatoes were planted cheaply. I had some Yukon Gold seed given to me by Denise Stafford. There weren't many, but it was what was left over from what she had planted. I also planted some Russets that had gone to seed in the pantry and some Reds that were of the same ilk. So, the planting was cheap. Essentially, it didn't cost me anything more than the effort and the ground. As a home gardener, I think it is better to be growing something in a garden spot than letting ground go unoccupied, so there might actually be a plus to having planted.

The harvest was honestly a bit skimpy. The Yukon Gold produced nice large tubers for the most part. The Russets and Reds were small. We used some in a few clay pot meals with chicken and some hash browns. There were still quite a few left over. My experience has been that potatoes in North Carolina don't store for very long. Too much humidity and heat. So, instead of just bagging them, I thought I would can some of them this year.

I bought a 23-quart Presto pressure canner. Kathy said it came 32 years late. But we now have it. I peeled for about an hour this morning. Small potatoes are a pain to peel, in case you couldn't figure that out. It made 18 pints and so far, have seemed to turn out OK, except for a few bottles that have too much air in them. Guess we should have tightened the lids a bit more. At least it appears they came out better than the pickles, which should have been canned a different way owing to the fact that I didn't understand the canning directions and over cooked them.

I'm not sure how we use these. We certainly couldn't survive on just our produce from the garden, but there is a sense of accomplishment in doing something.

One thing I learned is to not wait too long to harvest. This year, I kept the Reds in the ground a couple of weeks later than all the others. Too long in the ground tends to lead to some sort of decay.

Saturday, July 20, 2013

Problematic Pears


I'm not an orchardist. For Christmas, I received two books about orcharding, but neither prepared me for what has been happening to my pears.

I pruned the trees in February. The three trees had grown quite too tall for me to manage and so I did some drastic cutting. Perhaps I left some open wounds. Although the damage I am seeing hasn't been specifically around where I cut, but on a wide range of branches. Only two of the three trees have been affected. One theory I keep popping around in my head is that somehow, I ended up with a parasite. Or, it could me a number of problems.

I went out this evening and pruned off the branches that had dead leaves and shriveling fruit. Because I'm not skilled, I don't know what else I should be doing. I need to do some research about this.

Other than this, I actually have an abundance of fruit on all three pear trees. This is a very different situation than what I have found on my peaches and plums, which are almost bare.

Wednesday, July 17, 2013

Sunflowers -- Two Kinds


Jenna wanted to plant sunflowers this year. Entirely her choice. So, I figured out that we could plant 23 per 12' x 4' raised bed planter if we put 8 down either side and 7 down the middle, spaced so that they were 18" apart. What we had on hand were a variety known as lemon sunflowers. I bought two packets of seeds last year because I had the intention of participating in some sort of bee counting exercise and lemon sunflowers were what was called for. I never planted any, so we had just about enough to fill two planters (56 sunflower plants). Of course, once planted, not all came up. (I even pulled one out by accident.)

The obvious solution was to go buy more seeds. The variety that was in the store was called mammoth. So, in the spots were the lemon sunflowers didn't sprout, I replanted mammoth. Eventually, all the spots I had reserved for seeds had sunflowers growing in them. The lemon variety were supposed to get between 6 and 8 feet tall. The mammoth variety was supposed to get 12 feet tall.

Before Jenna left for the first of her many summer camps, I took a photo of her standing in front of the plants. She is 5'2" or so. The ones that bloomed at this point in time were mostly the lemon variety sunflowers. When I first saw them, I was confused because I expected there to be just one bloom and that at the top. Lemon sunflowers produce multiple flowers. By now, because I figured out how to grown them but not harvest them, the gold finches have pretty much stripped them of seeds.

On the other hand, the mammoth sunflowers are behaving more like I expected. The flowers are bigger and there is just one per plant. They are coming in much later. And true to what was promised on the package, the stalks are much taller. I think 12' may be just about what the tallest among them are. Maybe by the time they are all pollinated, I will have figured out how to harvest the seeds before the birds get all of them. Right now, as you can see in the photo, the bees are just getting around to pollinating them. (Not my bees; the hive died.) I think the bee in the photo is actually a bumble bee.

So, Jenna's idea has turned into an interesting plant. I think she just wanted to see the flowers and doesn't care about the seeds. The birds clearly care about the seeds. I can imagine growing some of both varieties each year. Easy to grow. Big! And useful for someone.

I learned that there are two major classes of sunflower seeds. What they call confectioner (meaning, I suppose that the seeds are good for eating as a snack) and oil producing. I believe what I have planted are all confection types. So, if I actually plan this for next year, I would like to experiment with some oil producing varieties.

Monday, July 15, 2013

Adventures with Garlic


Jared told me he missed by blog. It's been a very long time since I've posted anything. When Kathy asked me about it, I claimed having just too much failure. And there has been plenty of distraction. I think I essentially quit trying to garden last year, so there was nothing to write about. But this year, I got busy again. So, my first new post is about garlic.

I ended up with a fair amount of garlic from last year. It hung braided in the garage all winter. Then it started to sprout. I tried saving some of it and took the cloves that hadn't sprouted and dried them in the dehydrator. I used the garlic press to squeeze out what I could and then either took it as it was or used a rolling pin to make it into powder.

But, then I still had a lot that had gone too far into sprouting, so I put some out on the street with a sign inviting neighbors to take it and plant it, gave it away to people at church to plant, and then planted about 20 or so cloves myself. Garlic should be planted in the fall, not the spring, so it was just an experiment. I had actually also planted about 7 or 8 cloves last fall. The fall cloves were large. The spring cloves were small.

Still, you have to do something with the cloves. And given that my last year's bumper harvest all sprouted before I could use them, I decided to take a couple of the big cloves and see what I could do. My first attempt is shown here. I cut the cloves in half and then dehydrated them.. Then i tried to grind them up with a mortar and pestle. Probably the wrong approach. The dehydrated cloves were tough as nails and didn't break up easily. I ended up using a knife to make them smaller.

I did end up with three sizes -- rather large chunks of garlic, smaller chunks of garlic (more like what I think of as minced) and powder.

Then I read that the smartest way to store garlic is in white vinegar. The value is that you only have to get the clove out of its casing. That in and of itself is a little sticky. Although I learned that for many cloves, you can sort of squeeze from the top and the clove will separate from its skin nicely. So, I separated a couple of heads of garlic and stored them this way in a cup-sized jar. The recipe I read said the vinegar doesn't really penetrate the garlic. You just wash it off before you use the clove.

I finally harvested the remaining garlic that had been planted in the spring. The heads were smaller and the cloves were smaller, but I was able to get another three cup-sized jars out of the plants. I canned the jars just like I would anything else. Two of the lids sealed. Two didn't.

There were some cloves left over, so I chopped them up and dried them. They were easier to deal with in terms of getting powder and minced garlic than I had experienced when I tried the same process with the garlic that I had only halved. So, next time, if I want dry garlic in any form, I will cut it up first.

I like growing garlic. It grows well. I don't mind having too much of it. I can always give some of it away.