Title

Sufficient for Our Need
Striving for Self-Sufficiency in the Modern World

Sunday, March 28, 2010

Tomato Sprouts


When I planted the Marglobe seeds, I wasn't sure what would happen. It's been a little over a week and evidently just about every seed germinated and is now growing. I brought the plantings into the house because, as I learned by putting the outdoor thermometer in the greenhouse, temperatures drop to whatever the low is over night. That's probably good because the low in the greenhouse yesterday was 29F.


We will be gone for the week. I am hoping the peat pots will retain sufficient moisture to let the sprouts grow to the next state. Because multiple seeds sprouted, I will need to thin, but I will wait to do that until the plants have grown up a bit.

Saturday, March 27, 2010

New Raised Beds


Jason is out of work and needs something to do. I recruited him and his buddy, Michael Bolen, to build me three new raised beds for the garden. Last week, they spent about 12 man hours clearing the spots and digging level trenches for the wood frames to set in.


This morning, I went to buy pressure treated wood (ACQ: Alkaline Copper Quaternary). This is a version of pressure treated wood that can be used for gardening. The biggest problem I have had is finding wood that isn't terribly warped. I went to the Kernersville Lowes and, of the 30 or so pieces of 4x4x12 they had, just one wasn't warped. (The employees there didn't seem to have a clue that they really needed to junk it.) I eventually found what I needed at the I-40 Lowes.

I forgot how slow the process of building a raised be was. We started about 12:30 (just after noon). It took about half an hour to measure and cut the wood for the end pieces. (This process could be streamlined; the major time consumption was given to moving wood and explaining the process to Jason.) We use the full 12' for the side pieces and cut the end pieces to be 4'3.5". This allows the interior to be 11'8.5" x 4', good enough for square foot gardening in my book.

It took at least an hour to set up the wood and drill holes. I followed the process we have used in the past. I build the bed in the garage where we can keep things level and control things and then reassemble the unit in the garden.

We drilled the 14 holes we need to guide 1/2 inch rebar stakes to anchor the wood. We drilled 3 holes at each corner, 1 at the very corner and 1 to secure pieces that butt up against the corner, and 2 holes midway down the side pieces to keep the side pieces from warping. The challenge with the drilling process is that we need to use two different bits. The first goes through three layers of wood (about 12 inches) very nicely because it is fluted, but it is too short to make it through the fourth piece. For this, we use a flat wood drill bit that is long enough, but not efficient. Changing the bit adds extra time to the process.

By the time we got things to the garden, it was around 3:00 or 3:30. When we set the first row of pieces into the bed, it was clear that additional work to level the dirt and get the trenches right needed to be one, so we stopped for the day.

One thing I learned for sure. At 60, despite my general good health, I am very grateful for young accomplices. My lower back takes a real beating with lifting the wood and is really sore now.

Thursday, March 25, 2010

Who Needs Horseradish?


Kathy and I finally processed the horseradish from the garden. Wow! It's not so much the fragrance as it is the effect the chemicals have on your eyes and lungs. I'm not sure sting is the correct term.

We peeled the skin off the roots, rinsed them, and put them in the Cuisinart blender with the blade. I think it was the chopping that released whatever it was into the air. We processed about 3 cups, which in horseradish terms is a lot of horseradish.

Kathy found a prepared horseradish recipe online. I'm not sure which site she found the recipe at, but it had these ingredients and proportions.

They don't sell jelly jars in March in any of the local stores, so we put it up in pint jars -- two and a quarter. We may subdivide later.


Now, something to put it on. . .

Monday, March 22, 2010

Exuberance


Jonathan Hammond built two raised beds of 2" x 8" lumber. He put a wire screen and cloth barrier at the bottom of each bed. He made a combination of top soil from Oak Ridge Shrubbery, peat moss, vermiculite, and composted leaves from his yard for the soil. He talked to Jacob about what to plant. Then he called on me to come over to help them get started.


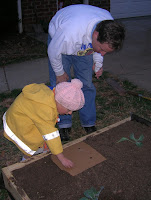
It wasn't just Jacob that was excited about getting going with this project. His brothers Isaac and Samuel were equally exuberant. There was enthusiasm at every step, from filling the bed with the soil to discussing what to plant where, to planting. I brought the cardboard planting templates I had created earlier. (I made 4, 9, and 16 hole templates from pizza box lids. I've since replaced these with templates made from Masonite.)

They planted onion sets, radish seeds, a cabbage plant, a broccoli plant, carrot seeds (Nantes, which won't grow too deep), spinach seeds, and beet seeds. We planted the first raised bed, leaving the second bed for a later expedition. Jonathan was good about getting them all involved and letting each take a turn.

All in all, it was refreshing to see such young people have such enthusiasm for gardening!

Sunday, March 21, 2010

Planting Potatoes


Every year I face this dilemma. I cut the seed potatoes and let them form a crust, then it seems it takes me too long to get them in the ground. Either it is cold or raining or there is some other challenge. This year, the challenge was that there were weeds growing in the first box I was going to plant in and, even though the second box was relatively weed free, it was the home of a horseradish plant that had been there six or seven years. My fear is that the seeds dry out too much and go past where they will sprout.


It took me two days of after work evening effort to clean out the weeds from the first plot. I don't know if you can judge the size of the pile from the photo, but I bet it weighs 50 lbs. I don't know the name of the weed, but the roots stick to the soil. I will have to run the mess through the chipper shredder to do anything with it.

But I finally got the bed cleared and the Yukon Gold planted. I have kept to my square foot method. I dig a hole in the middle of each square foot; down about 6" to 8" into which I set the potato seed. As the seed sends up its sprouts, I fill in the hole and then add compost.


Taking out the horseradish from the second bed proved an interesting challenge. The roots had grown very large and had gone very deep. What do you do with this much horseradish anyway? Out of a commitment to use what I grow, I feel the need to do something with it, but I'm not yet sure what.


I planted Pontiac Red in the second bed. I did something a little different with them; I put some water in the bucket I kept them in as I carried them around the bed, just enough to wet them a little. There are now 48 seeds in each bed. We expect rain today, but I went ahead and watered each hole.

Saturday, March 20, 2010

Pruning


When Doug Shaw was here the other day, he commented that I needed to get out and prune the orchard. It was a nice morning to do it.

Some of what needed to be done was attending to my apricot trees. The grafted trees died last year, but the roots for both of them evidently lived. Both roots sent up suckers.

I know that without the grafts, I won't have good fruit (or maybe any fruit at all), but my thinking is that if the roots are still good, I may eventually be able to graft something on that will replace the trees I lost.

So, I selected a strong sucker and pruned out the rest. I left the old trunk in place, thinking it would serve some purpose. As you can see in the photo, a fungus of some sort has already started to work on the old trunk. It's just an experiment. I'm in no hurry and time will tell. I had one apple tree die last summer and a pecan that never did take hold. I did the same for these trees that had sent suckers up because its roots were evidently still alive.

I also pruned the other trees in the orchard. Most of the apples needed just a little thinning. I'm no expert. My strategy is to simply take out branches the either point the wrong direction or cross over other branches. I did a little pruning on the pears, but not much, and minimal pruning on the plums. I left the peaches, the pecans, and the persimmon alone.

All the trees had signs of buds. The temperatures have been warm the past few days. All the flowering trees will soon be in bloom.

Reforesting


Karl Knutson and his daughters came to help me reforest this morning. Jason and I had marked off where the tulip poplars were to be planted in the area of the yard that I had let go natural last summer. The area is 60' x 60'. I figured a method of planting that allowed us to get 60 trees in the area evenly spaced in 8 rows; 4 rows of 8 trees that alternated with 4 rows of 7 trees. Trees and rows were all spaced at 8' with a 2' border all around.


Karl and his daughters did all the work. It helps to have machinery. The auger did the work in about a fourth of the time it would have taken me and they didn't need to take that many breaks to rest.The auger created a nice hole to plant in. It was well worth having someone else do this one. I hope the result will be what I anticipate. Tulip poplars are supposed to grow fast and provide nectar for the bees. The saplings provided by the Department of Forestry Resources are very small. I'm not sure what proportion will grow.

While they had the auger in the yard, I asked them to dig me a few extra holes to plant some 2-year old asparagus that Linda Dusenbury gave me.

Friday, March 19, 2010

Small Hive


I popped the top of the hive in our yard Thursday evening to check out the lumps of sugar I had put on top. The temperatures were nice. I didn't wear any gear, just because the hive appears so weak. It turns out that I certainly didn't need any. I pulled off the top feeder. There were a few dead bees on the sugar and a whole lot of cockroaches. There were still live bees inside, but very few. They were mostly huddled in the space between two frames.

I took the top feeder in and mixed hot water in with the sugar to create a true spring syrup. In this case, I couldn't measure precisely because I was too lazy to take the sugar out of the feeder, a task that because the sugar had solidified would have taken awhile. But it seemed that the hot water and a little patience stirring it got the density I expected.

I asked Doug Shaw to come over at lunch to help me. The top super had practically no weight. I didn't see any bees in the brood box. I pulled no frames because we figured it would only do harm.

I have several solutions for the future. First, I think I need to move the hive. It is now in the shadows of the pines all through the winter. The snow stays in that area much longer. The question was, "Where?" I didn't like the idea of the south side of the house. That would be too close to human activity. Doug suggested that I move it to the south side of the greenhouse. A brilliant idea! It is out of the way, not visible from the street, and would get a lot of sun.

Second, I think I need to requeen or combine bees from the other hive with this one or both. The bees looked a little more lively in the evening. They were coming out of the hive for the first time. I don't know for sure if the queen is dead. I'm not sure what a small colony can do in terms of repopulating itself. I asked Doug to see about getting a new queen. (He has an order for a new package that should come next week. It won't hurt to ask.)

Sunday, March 14, 2010

First Seeds

I thought Saturday was going to be a rainy day, so I didn't plan on doing anything in the garden, but then I woke up and it was clear, so I decided it was time to start trying to get some things going. My first task was to plant some of the Marglobe tomato seeds I had saved from last season. What Irvin Brown told me was that heirloom tomatoes can keep bearing genetically pure fruit, whereas hybrids can only be grown the first season. So, this is an attempt to see how self-sufficient I can be.


I planted seeds in 24 peat pots with regular planting soil I purchased from Lowes last fall. The only thing that was unexpected was that the soil didn't immediately start absorbing water. So I got a mixing bowl and a wooden spoon to mix the water and potting soil together until water had been absorbed. I planted two seeds per pot just because I haven't a clue about germination. I separated the seeds so that in case two grew in one pot, I could easily dispense with the second. I put the peat pots on a baking pan. (I stopped at 24 because that is how many fit on the pan). I put some extra water in the pan, with the idea that maybe the peat and potting soil would absorb it. I looked today and there wasn't any water sitting in the bottom, so it appeared that it worked that way. I am keeping the pots in the greenhouse but with the vent open. The temperatures inside during the day are getting into the high 70s.

Last year, I had 16 Marglobe plants, so this will up that by 50%. I may get ambitious tomorrow and start a few more Marglobe )so I can double my planting) and do some German Johnsons, too.

While I was at it, I decided to prepare the potato seeds as well. I did what I've done in the past; I cut the seed potatoes so that, to the extent possible, each slip has one good eye developing. Then I turn the slips upside down to form a crust. I think by Monday evening, I should be ready to plant. I haven't prepared any ground yet, so that is a task I will need to do before hand. The weather the next few days should be mild, so it appears to be a good time to get the potatoes in the ground.

I will keep my strategy for planting potatoes this year. I plan to plant them 48 per bed with one bed dedicated to Yukon Gold and one dedicated to Pontiac Red. In the past I have left them in the house to form their crust. I like doing it in the greenhouse this year, just because it hasn't messed up the dining room and the temperature seemed to be right to accomplish the task. I will have a few extra of these to give to Jonathan and Jacob Hammond.

Tuesday, March 9, 2010

Finally!


Finally, a day above 60f. The snow melted under the trees. The bees in the hive in my yard started venturing out. The bees in Clarence Brown's yard have been active much earlier because that hive gets direct sun. I was worried about the hive in my yard because it is so sheltered and is probably 15f degrees cooler. It means that unless there is a really warm day, they won't break cluster. I only saw a few from the hive, but they were out. I took some rosemary leaves Sunday to make dinner and noticed that it is still in bloom and there were a few bees visiting there then, but I'm not sure they were from the hive in my yard. Anyway, winter may be over and the hives will come alive again and I am grateful both colonies made it through.

Doug Shaw gave me back the hive body and super that had been infested with moths. He also gave me a box with frames from which he had extracted honey from his dead hive as well as a pan that had some honey drippings from the extraction on it. I put the pan in my yard and the empty box in Clarence's yard yesterday at noon. By the time I got home from work, bees had pretty clearly found the box, but the pan seemed untouched. So I moved it from the hive to the driveway. I'm sure they will find it.

Finally!

Saturday, March 6, 2010

Onion Sets

It wasn't as warm today as I had hoped, but it was at least warmer than it has been and it was warm enough for me to feel good getting outside.

Today was a good day to plant onion sets. Last week I turned the soil, added some 10-10-10 and then let the bed sit. It snowed again during the week. It melted in most places, but stayed a bit longer in Oak Ridge. I think it is because our elevation here is a bit higher than Greensboro. But, by Thursday, the snow was all gone in the areas that had sunlight. (It is still on the ground in the shaded area by the beehive.)

My strategy this year was to plant the yellow onions on the north side of the bed and the red onions on the south. The east end of the bed was totally free, but there were still a few onions I had started from seed on the west end, so I just planted around them.

I have kept to the 9 per square foot pattern. I went through my gardening books to see if I needed to adjust the pH level, but only two books mentioned it (the original Square Foot Gardening book and Dick Raymond's Joy of Gardening). I know from past measures that my soil is a little acidic (between 6 and 6.5) and it seemed that this range was fine for onions, so I just left the soil alone.

The one piece of advice I picked up was the need to side dress the onions periodically through the growing season. I've had smallish onions in the past. I plan to try this out this year.